✨Free Shipping on Orders Over $50 | Designed for Custom Lure Makers
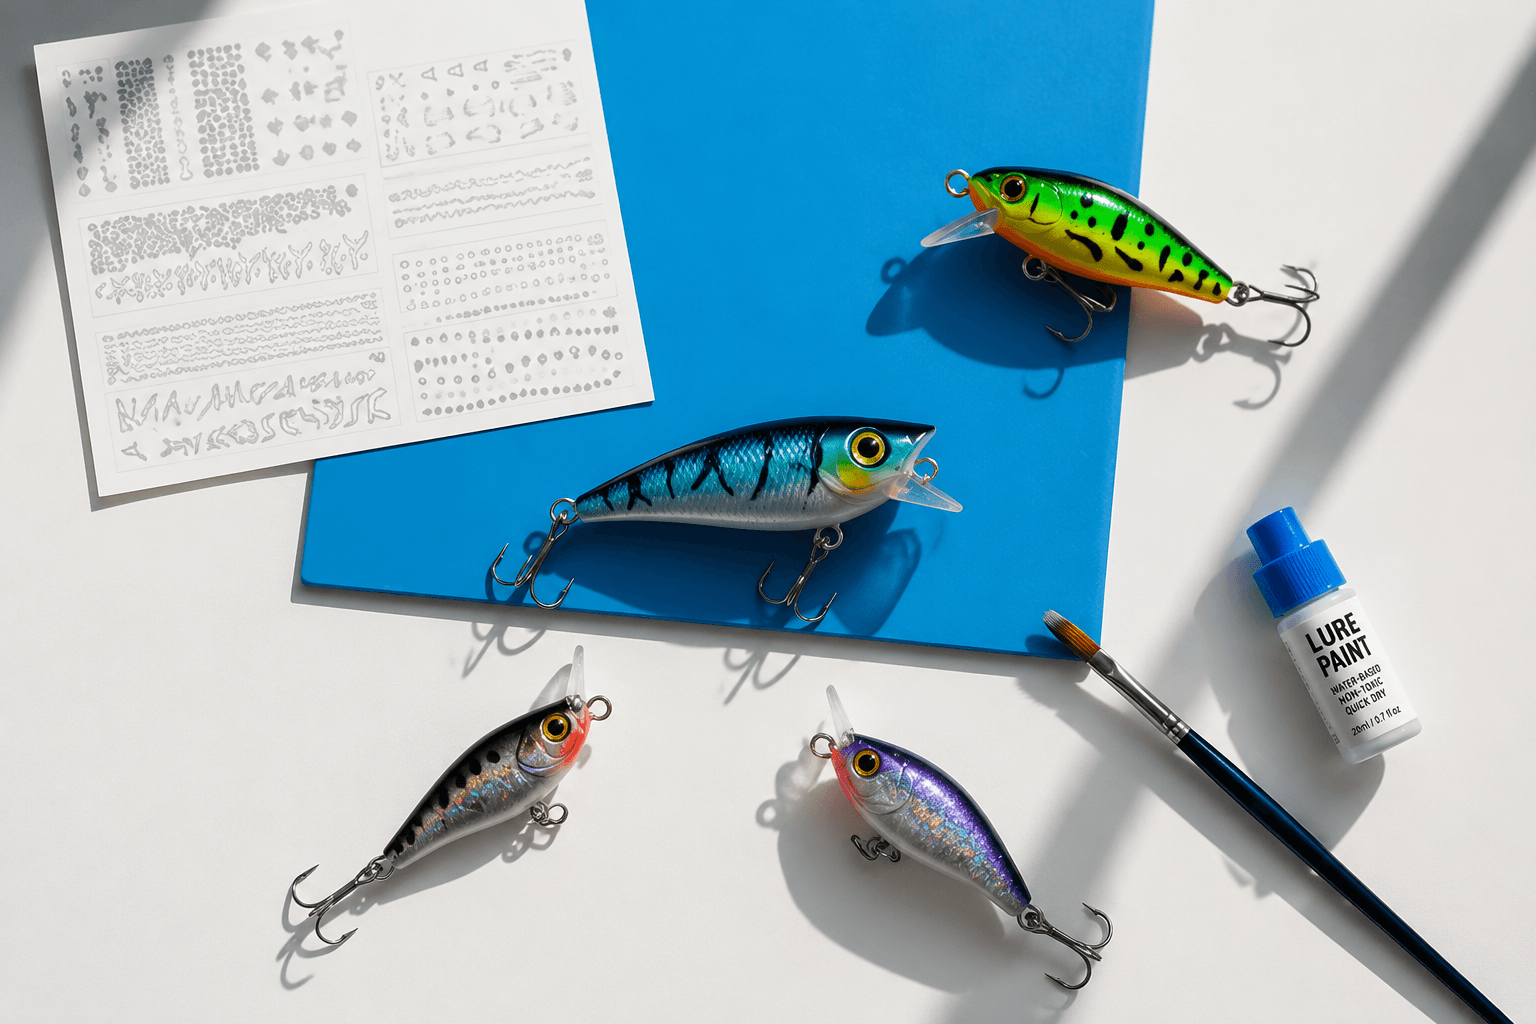
Painting your own fishing lure is one of the most rewarding parts of custom lure making.
Instead of choosing from factory-made colors, custom lure painting allows anglers and lure builders to create unique designs based on fishing conditions, target species, and personal creativity.
Whether you are starting with a plastic lure blank, wooden lure blank, or a custom bait body, the painting process follows the same basic principles:
- Preparing the surface
- Applying a proper base coat
- Building realistic color layers
- Creating custom patterns
- Protecting the final finish
A well-painted lure is not only visually attractive. The right color combination and finish can help create a more realistic bait presentation in different fishing environments.
In this guide, we will explain how to paint a fishing lure from an unpainted blank to a finished custom bait.
What You Need to Paint a Fishing Lure
Before starting your lure painting project, prepare the right tools and materials.
A professional-looking finish depends not only on painting skills but also on proper preparation.
1. Fishing Lure Blank
The first step is choosing the right lure blank.
What is a lure blank? A lure blank provides the foundation of your custom fishing lure.
Common options include:
- Hard plastic lure blanks
- Swimbait and glide bait blanks
- Wooden lure blanks
- Resin lure blanks
Different blank materials require slightly different preparation methods.
For example:
- Plastic blanks usually require surface cleaning and light sanding.
- Wooden blanks may require sealing before painting.
- Resin blanks often require additional surface preparation to improve paint adhesion.
Ready to Create Your Own Fishing Lure?
Start your custom lure project with premium unpainted lure blanks designed for painting, customization, and lure making.
2. Fishing Lure Paint
The type of paint you choose affects the final appearance and durability of your lure.
Common options include:
Acrylic Paint
Popular among lure makers because it:
- Dries quickly
- Works well with airbrush systems
- Allows multiple color layers
Airbrush Paint
Airbrushing is commonly used for professional lure painting because it allows:
- Smooth color transitions
- Realistic shading
- Detailed patterns
Brush Paint
Hand painting can also create unique finishes, especially for:
- Small details
- Custom artwork
- Handmade lure designs
3. Primer and Clear Coat
Primer creates a better surface for paint adhesion and helps colors appear more consistent.
A clear protective coating is also essential because fishing lures experience:
- Water exposure
- Fish strikes
- Contact with rocks and underwater structures
A quality clear coat protects the paint layers and extends the life of your custom lure.
How to Paint a Fishing Lure: Step-by-Step Guide
Step 1: Prepare the Lure Blank
Proper preparation is the foundation of a professional lure paint job.
Many beginners focus only on the colors, but surface preparation determines how well the paint bonds and how long the finish lasts.
Clean the Surface
Before painting:
- Remove dust
- Remove oil and fingerprints
- Clean any manufacturing residue
A clean surface helps primer and paint adhere properly.
Sand the Lure Blank
Light sanding creates a surface texture that allows paint to bond better.
Recommended:
- Fine sandpaper
- Smooth even sanding
- Avoid removing important body details
For plastic lure blanks, light surface preparation is usually enough.
For wooden lure blanks, sanding is often combined with sealing and priming.
Apply Primer
Primer creates an even foundation for your colors.
Common primer choices:
White Primer
Best for:
Bright colors
Natural baitfish patterns
Pearl finishes
Gray Primer
Best for:
Darker patterns
More natural tones
Step 2: Apply the Base Coat
The base coat creates the foundation of your lure pattern.
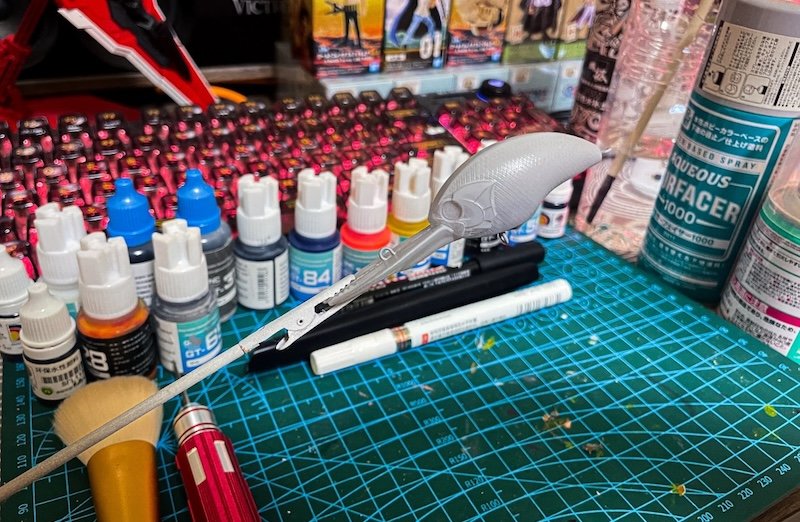
Many realistic fishing lure designs start with simple colors:
- White
- Pearl
- Silver
- Gold
The base color influences how the following layers appear.
For example:
A white base coat can make bright colors appear stronger, while darker bases create deeper and more natural finishes.
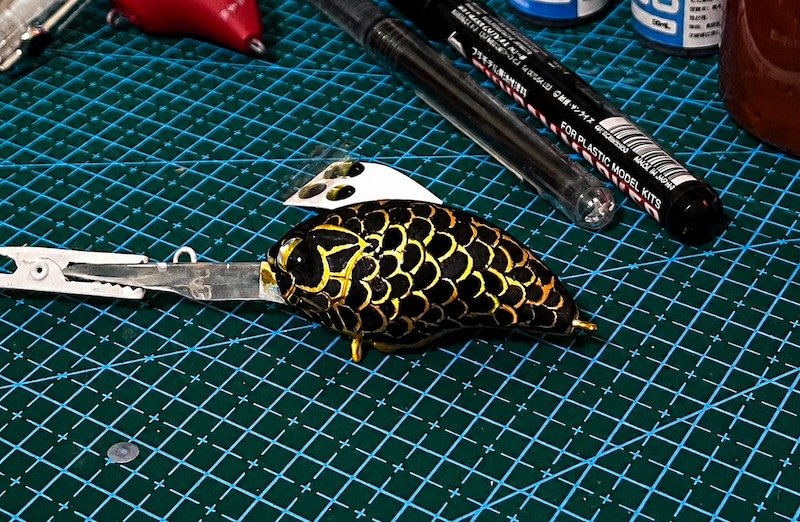
Step 3: Add Color Layers and Fishing Lure Patterns
This is where a blank becomes a custom fishing lure.
Professional lure painting is usually done through multiple thin layers rather than applying one thick coat.
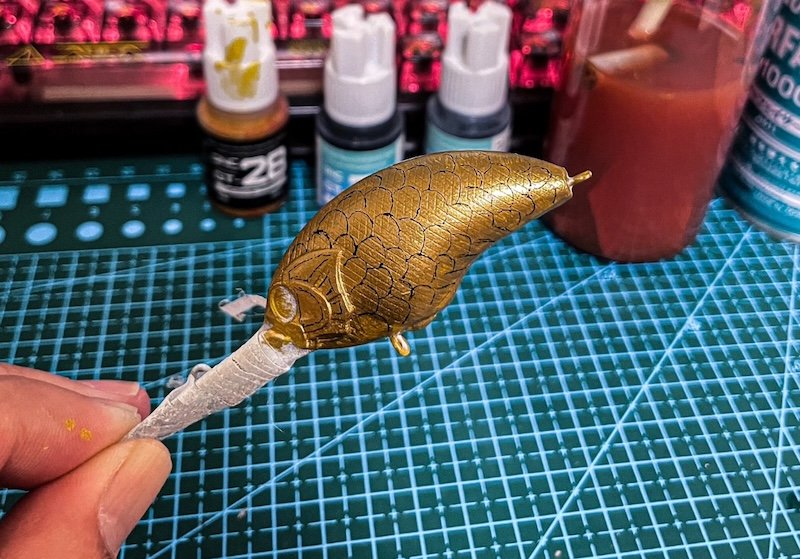
Common techniques include:
Color Blending
Airbrushing allows smooth transitions between colors.
Examples:
- Dark back to light belly
- Green to yellow transitions
- Blue and silver baitfish patterns
Scale Patterns
Many realistic lure designs use:
- Mesh patterns
- Stencils
- Custom templates
These techniques help recreate natural baitfish textures.
Adding Details
Small details can make a major difference:
- Gill marks
- Eye details
- Spots
- Contrast lines
- Shading effects
Step 4: Choose the Right Fishing Lure Colors
Color selection is an important part of custom lure painting.
The best color pattern depends on:
- Water clarity
- Weather conditions
- Target species
- Natural forage
For example:
| Fishing Condition | Recommended Colors |
|---|---|
| Clear Water | Natural baitfish colors |
| Stained Water | Contrast colors |
| Low Light | Bright or UV-style patterns |
| Deep Water |
Strong contrast colors |
👉 Explore our Fishing Lure Pattern Library
Popular Fishing Lure Patterns
Many successful lure designs are inspired by natural prey species.
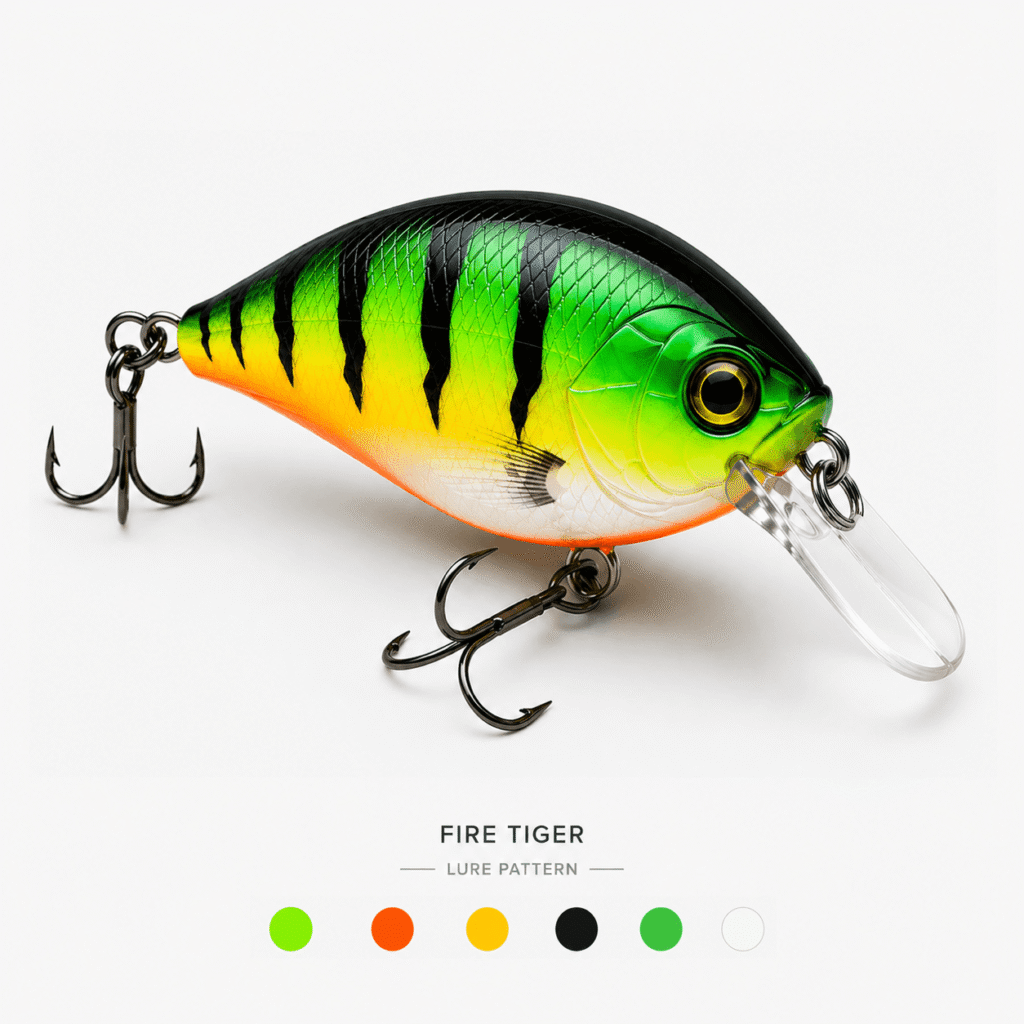
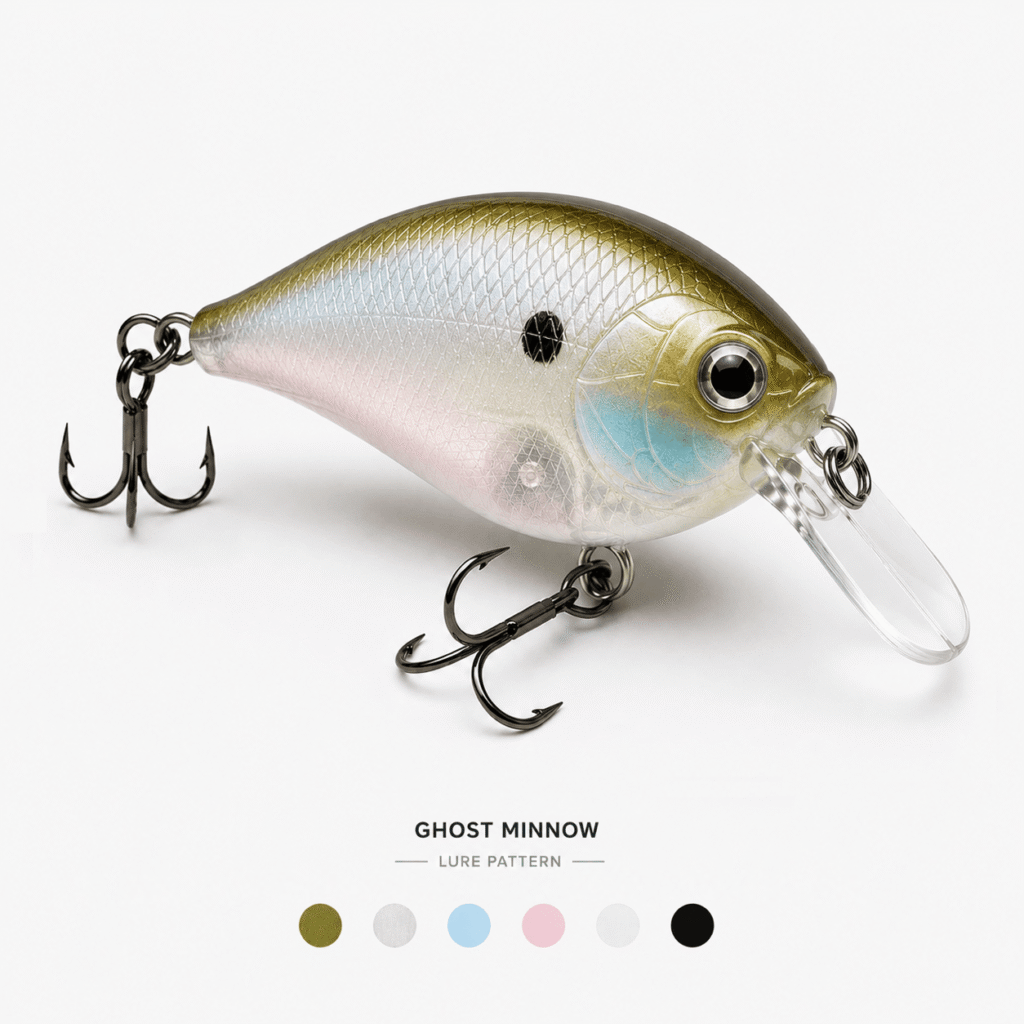
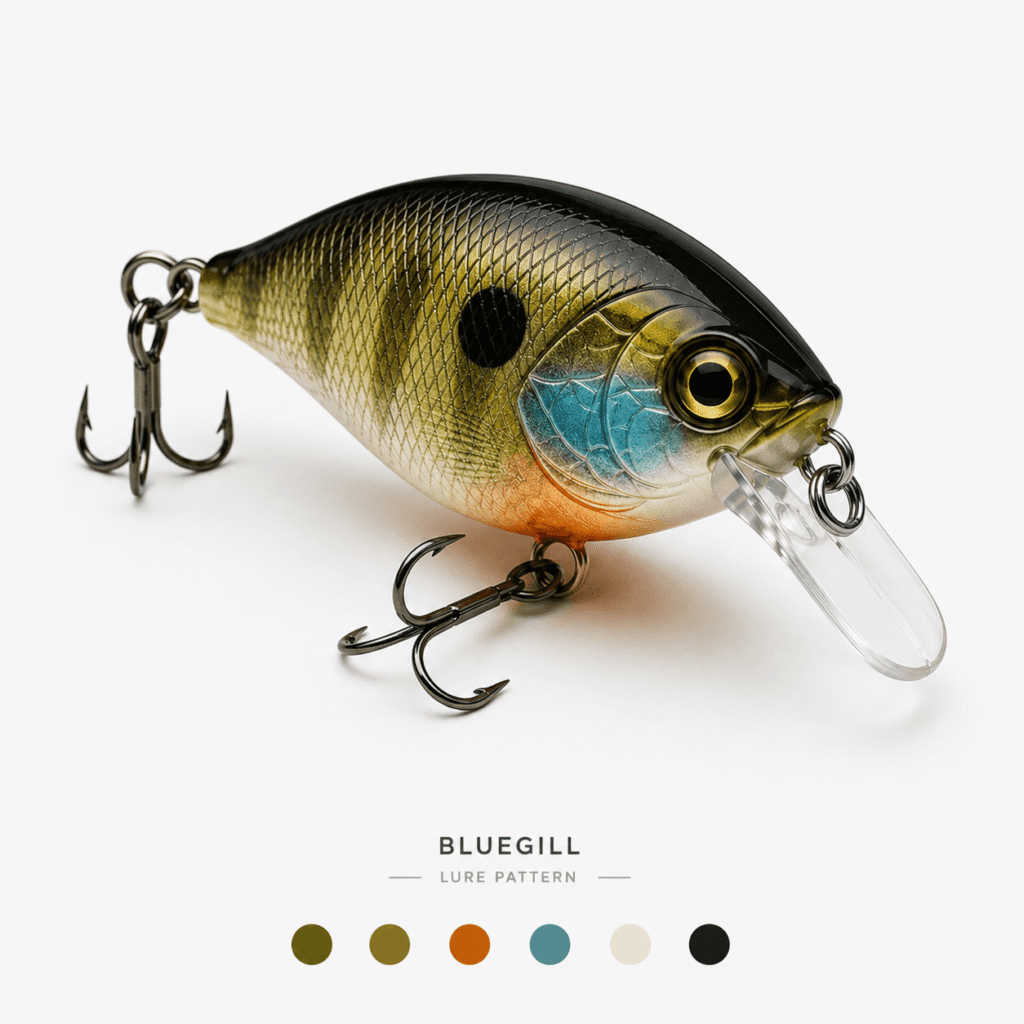
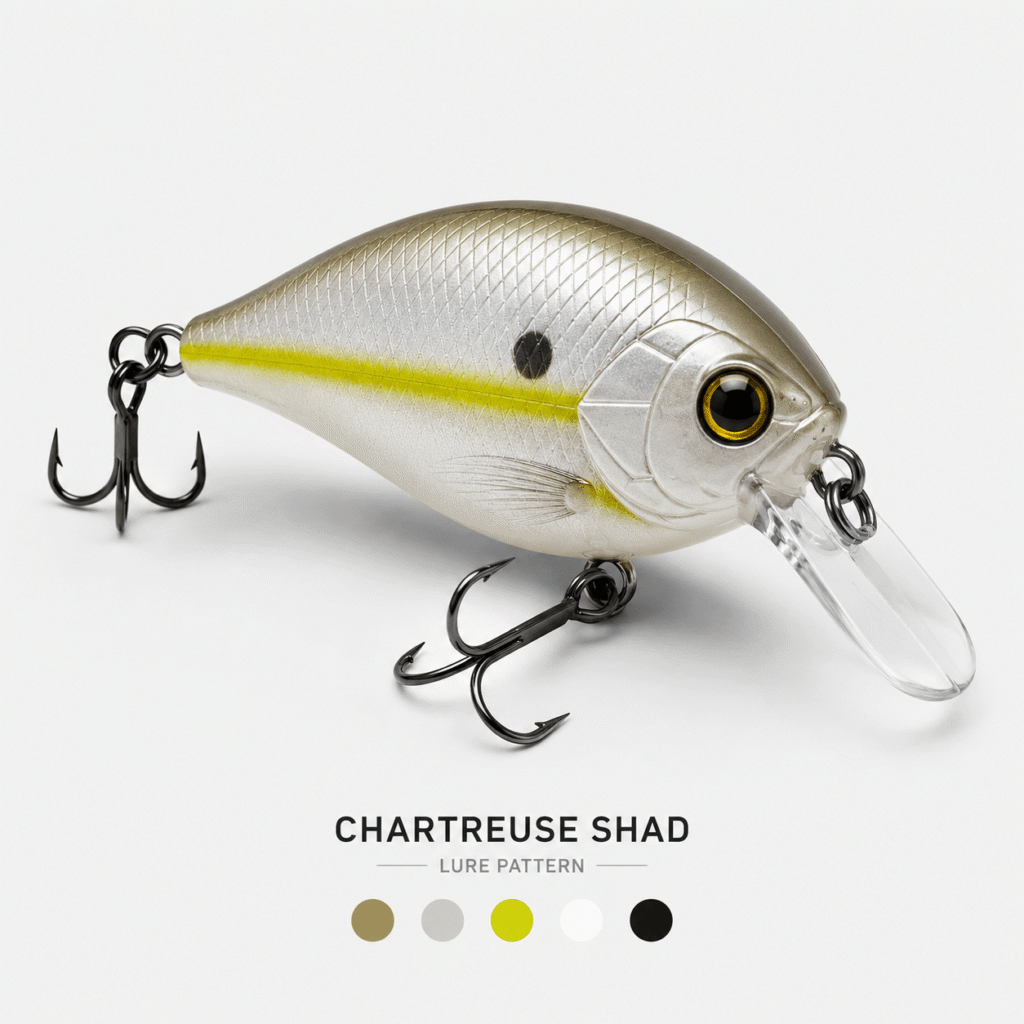
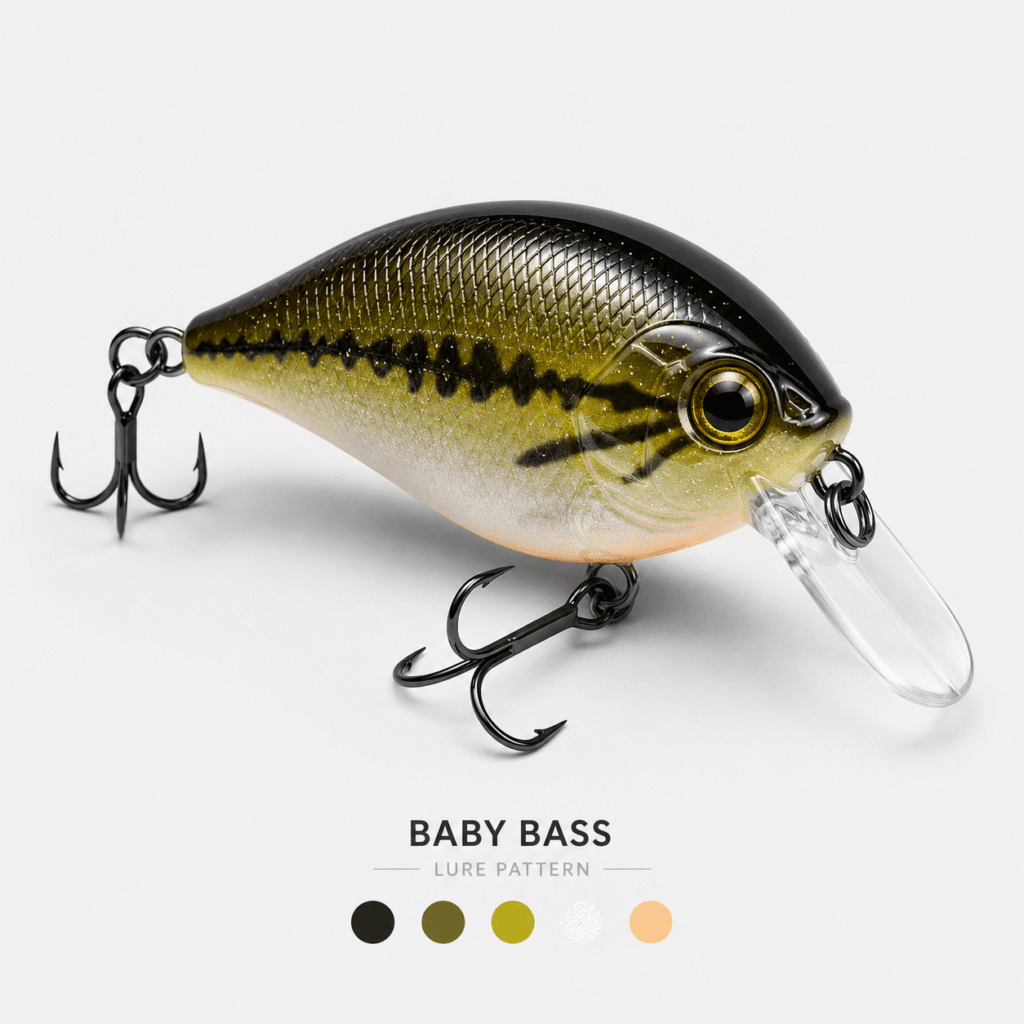
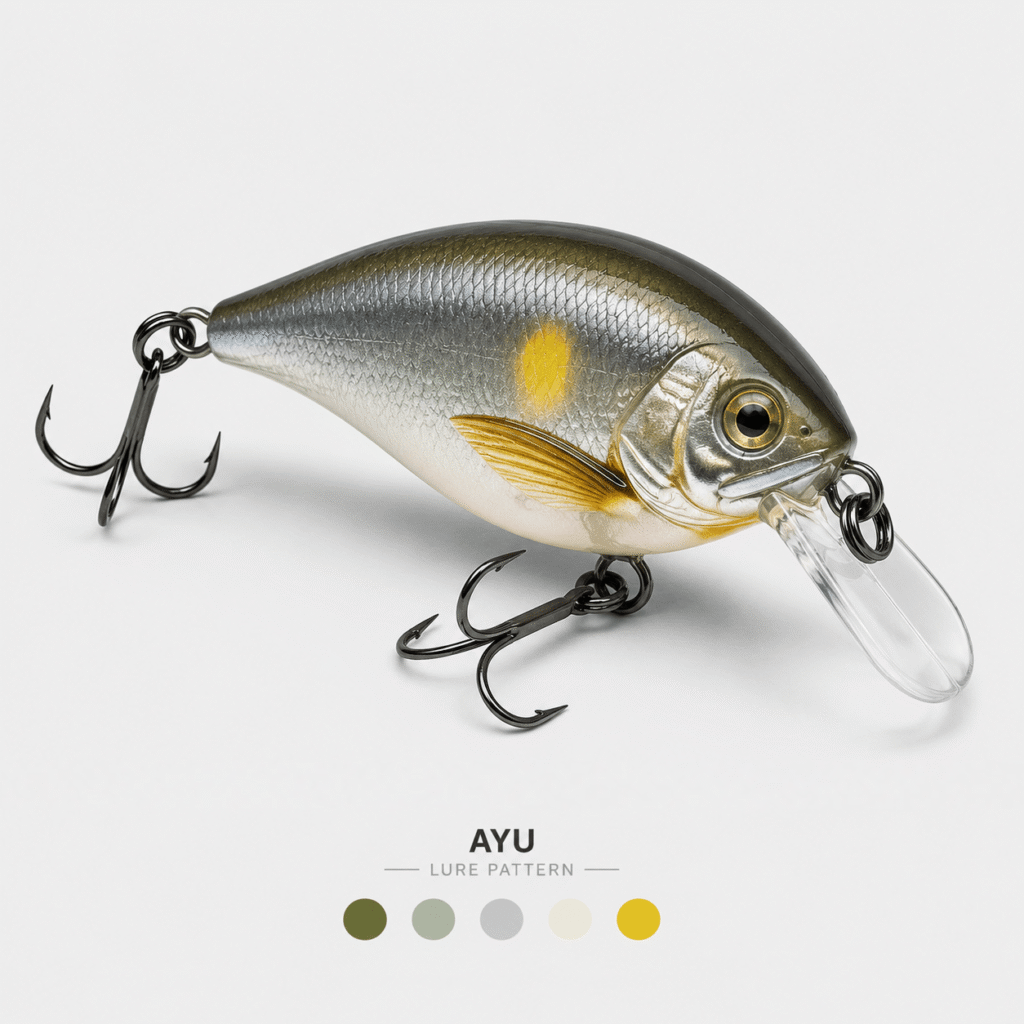
Popular custom lure patterns include:
A natural baitfish pattern commonly used in clear water situations.
Designed to imitate small translucent baitfish.
A high-contrast pattern often used in stained water conditions.
A popular predator pattern for bass fishing.
Step 5: Add Clear Coat and Protect the Finish
The final protective layer is what turns a painted lure into a durable fishing tool.
A clear coat protects against:
- Water damage
- Scratches
- Fish teeth
- Impact during casting
Common finishing options include:
- Epoxy coating
- UV resin
- Protective clear finishes
Allow sufficient curing time before using the lure.
A rushed finish can damage an otherwise excellent paint job.
Painting Different Types of Lure Blanks
Different lure blanks require slightly different approaches.
Painting Hard Plastic Lure Blanks
Plastic blanks are beginner-friendly because they provide:
- Smooth surfaces
- Consistent shapes
- Reliable painting results
The main steps are:
- Clean surface
- Light sanding
- Primer application
- Base coat
- Pattern layers
- Clear coat
Painting Wooden Lure Blanks
Wood requires additional preparation because it absorbs moisture and paint differently.
Before painting:
- Seal the wood
- Sand the surface
- Apply primer
Wooden blanks are popular among handmade lure builders because every finished lure can have unique characteristics.
Painting Swimbait and Glide Bait Blanks
Large multi-section lure blanks require special attention.
Important areas include:
- Joint movement
- Realistic color transitions
- Natural baitfish patterns
Because glide baits often imitate large prey, realistic finishes are especially important.
Ready to Create Your Own Fishing Lure?
Start your custom lure project with premium unpainted lure blanks designed for painting, customization, and lure making.
Common Mistakes When Painting Fishing Lures
Applying Paint Too Thick
Thick paint layers can:
- Hide details
- Create uneven surfaces
- Increase drying time
Thin layers usually create better results.
Skipping Surface Preparation
Painting directly onto an unprepared surface can lead to:
- Poor adhesion
- Peeling paint
- Uneven finishes
Choosing Colors Without Considering Fishing Conditions
A beautiful pattern may not always be effective in every environment.
Consider:
- Water clarity
- Light conditions
- Local baitfish
Can Beginners Paint Their Own Fishing Lures?
Yes.
Many beginners start with a simple lure blank and gradually improve their techniques.
A good beginner approach is:
- Choose a simple blank
- Use basic colors
- Practice layering
- Experiment with patterns
You do not need professional equipment to create your first custom lure.
However, as your skills improve, tools like airbrush systems and advanced finishing techniques can help create more detailed results.
Final Thoughts: Create Your Own Custom Fishing Lure
Painting a fishing lure is more than adding colors to a blank.
It is the process of transforming an unpainted lure body into a custom bait designed around your own fishing style.
By choosing the right lure blank, preparing the surface correctly, selecting effective colors, and applying a durable finish, anyone can create a professional-looking custom fishing lure.
Start your next lure project with a quality blank and explore proven fishing lure patterns to bring your ideas to life.